Apple Content Caching and You (Setup and Advanced Options)
Surely the point of wanting to set up great WiFi is to give our users a great experience? I get that there are other rewards too but the ultimate thing must be that a user doesn’t have to think about the WiFi… about the internet… about anything, that it ‘just works’?!?!
That’s why I love that Meraki comes with QoS Pre-set for people that don’t really know what they’re doing… if you do know what you’re doing you can tweak it for your specific network needs but for the majority of people, the default works great!
*to be fair, most of the time we leave it as it is because it works so well for the majority of clients.
If the goal is end-user satisfaction, why doesn’t everywhere I go use an Apple Content Caching Server? At least one!
They’re virtually free; you just need Mac hardware (content caching is now included with macOS and doesn’t require the server app) - it doesn’t even have to be recent. In most cases, we use machines that the client was going to throw out (mainly Mac mini’s). But it makes a massive difference!
We’ve all been there… an iOS update drops and every network admin rushes to rate limit or somehow curtail the bandwidth going to every iOS device to make sure that it doesn’t cripple the network all day (although it’s well documented here and here that you shouldn’t do this on the air - do it at the firewall instead). It’s worth noting that the built-in Caching Service doesn’t just cache iOS or macOS updates… here’s the list of what it does cache:
macOS
macOS updates and Internet Recovery images (macOS 10.13.5 or later)
Apps and app updates from the Mac App Store
GarageBand downloadable content
iCloud data caching (photos and documents)
Apple Books content
Xcode downloadable components such as simulators (Xcode 10.2 or later)
iOS 7 and later and Apple TV
iOS updates (over the air)
Apple TV updates (over the air)
Apple TV screensavers (tvOS 12.2 or later)
iOS apps, Apple TV apps, and app updates
On-demand resources support for iOS 10 and later and tvOS 10 and later.
iCloud data caching (photos and documents) for iOS 9 and later
iTunes U course materials from the iOS App Store and Apple Books, as well as uploaded instructor materials such as audio, video, iWork, and iBooks Author files
Apple Books content
Certain mobile assets, such as Siri high-quality voices, language dictionaries, and more
So how do you turn your old Mac hardware into a content caching server? Well, I’m glad you asked 😉
Apple has a great support document to help. But I’ll show you here with some .gifs and stuff 😎

On your Mac, choose Apple menu > System Preferences, click Sharing then select Content Caching.
In the service list on the left, select the Content Caching tickbox, then wait for the content caching indicator to turn green.
Click the Cache pop-up menu, then choose the content you want cached.
All Content: Store software updates and apps downloaded from Apple, and iCloud content on this Mac.
Only Shared Content: Store only software updates and apps downloaded from Apple on this Mac.
Only iCloud Content: Store only iCloud content, such as photos and documents, on this Mac.
Restart the client devices that will use the content cache.
Restarting the client devices ensures that they discover the content cache immediately. If the client devices aren’t restarted, it takes some time before they discover the content cache.
This next bit is important… If you want this to work with no extra setup you’ll need to make sure that each content cache must have either a local IP address that conforms to RFC 1918, or a non-RFC 1918 local IP address that is the same as its public IP address.
RFC 1918 Addresses:
10.0.0.0 to 10.255.255.255 (10/8 prefix)
172.16.0.0 to 172.31.255.255 (172.16/12 prefix)
192.168.0.0 to 192.168.255.255 (192.168/16 prefix)
Oh, and content caching only works when your Mac is awake. To prevent your Mac from going to sleep, choose Apple menu > System Preferences, click Energy Saver, then select the “Prevent computer from sleeping automatically when the display is off” tickbox. To keep a headless computer awake, you can use the “caffeinate” command-line utility in Terminal.
Here’s the biggy…
If you hold down the ‘alt’ key and you’ll turn ‘options’ into ‘advanced options’. 💥 (that’s emoji for BOOM!)
Click Options to set the cache size.
Press and hold the Option key, then click Options, or click Advanced Options to set options for the cache size and content caching clients, peers and parents.

You also get some extra options…
You’ll notice (if you’re quick) that you get a new set of tabs at the top of the pulldown. Let’s go through them now.
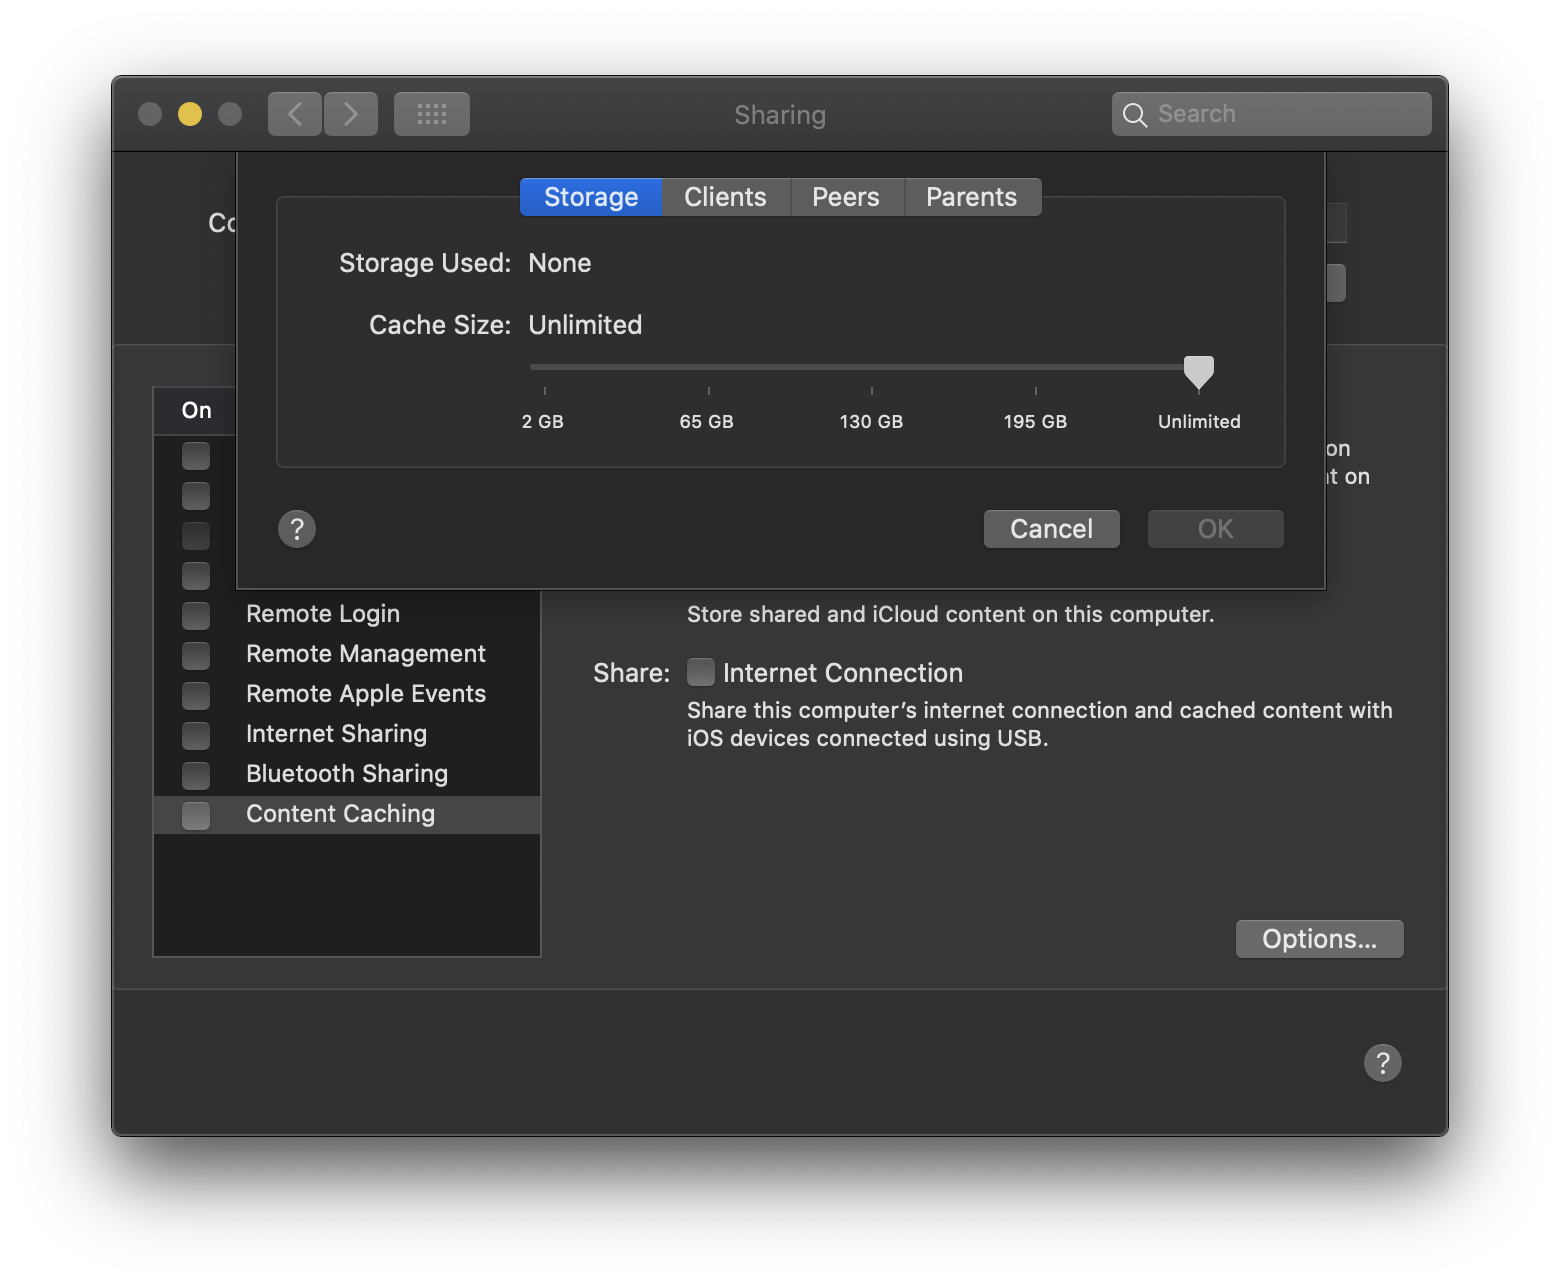
Storage: This is where you can set a limit on the amount of space that your cache can use and what disk it should be held on. Again, I tend to use content caching on older Macs so I’ll normally leave the internal disk just for the OS and have a cheap external drive holding the cached data. To determine whether you’ve allocated enough storage for the content cache, see View content caching statistics.

Clients: This tab allows you to set perimeters for what clients the cache will serve. You get a few options:

default - devices using the same local networks
devices using the same public IP address
devices using custom local networks
devices using custom local networks with fallback (this is my fav - allows me to set caching rules per VLAN but with ‘whole network’ fallback).
You also get the option to set your ‘local’ networks by adding additional Public IP addresses. After you enter the address ranges if you need to create a DNS TXT record, click the DNS Configuration button. See Enable content cache discovery across multiple public IP addresses.
Peers: (other caching servers) - here you can choose which share this server’s cached content with. Again, you have options here:
Default - content caches using the same local networks
content caches using the same Public IP address
content caches using custom local networks (perfect for VLANs etc)
Parents: The list of local IP addresses for parent caches. Enter the addresses in the order you want them used when a parent cache is selected.
You then have to choose a Parent Policy:
First available: Always use the first parent in the parents list that is available. This is useful for designating permanent primary, secondary and subsequent parents.
Hash: Hash the path part of the requested URL so that the same parent is always used for the same URL. This is useful for maximising the size of the combined caches of the parents.
Random: Choose a parent at random. This is useful for load balancing.
Round robin: Rotate through the parents in order. This is useful for load balancing.
Sticky available: Starting with the first parent in the parents list, always use the first parent that is available. Use that parent until it becomes unavailable, then advance to the next one. This is useful for designating floating primary, secondary and subsequent parents.
If you want to go full tilt on this you can access all of this through Terminal (great for setting up multiple servers at once - I do this with Apple Remote Desktop). - I won’t get into this here but Apple has a great doc here. Doing this gives you SO MUCH MORE you can do.
To give you a ‘real world’ setup…
Single Subnet with Single Content Cache:

What if my network has multiple subnets?

I’ve set up a few content caching servers in my time and I try to have Caches on the edge as often as I can. I’ll have a ‘Parent Cache’ at the data server level with as many 2TB ‘Children Caches’ on the edge as I can. Again, this massively reduces the load on the network (not so much wireless but it does stop people complaining about the WiFi when in actual fact it’s just the backhaul struggling). This is especially true when thinking about Schools and education… Students tend to be in the same room (therefore edge switch) when they access the same data (iCloud). This means that the content cache at that edge device will be caching the content that’s accessed at that same location. Same for the staff!
This was longer than I was hoping… and I still feel like I missed out a bunch of stuff so feel free to ask questions either here or send me a message on twitter (@UKDanJones) if you have any questions!